You can tailor the look, layout, and design of your new Schedule Widget by customizing its “skin” to match your business needs. The new version is marked with a green indicator 🟢. You can also customize the legacy version of the widget, marked with an orange indicator 🟠.
If you want to share your widget without embedding it, you can copy a shareable link to your schedule instead. This method is perfect for emails, text messages, social media bios, and QR codes. For more information, see Share a Schedule Widget link.
Access your Schedule Widget
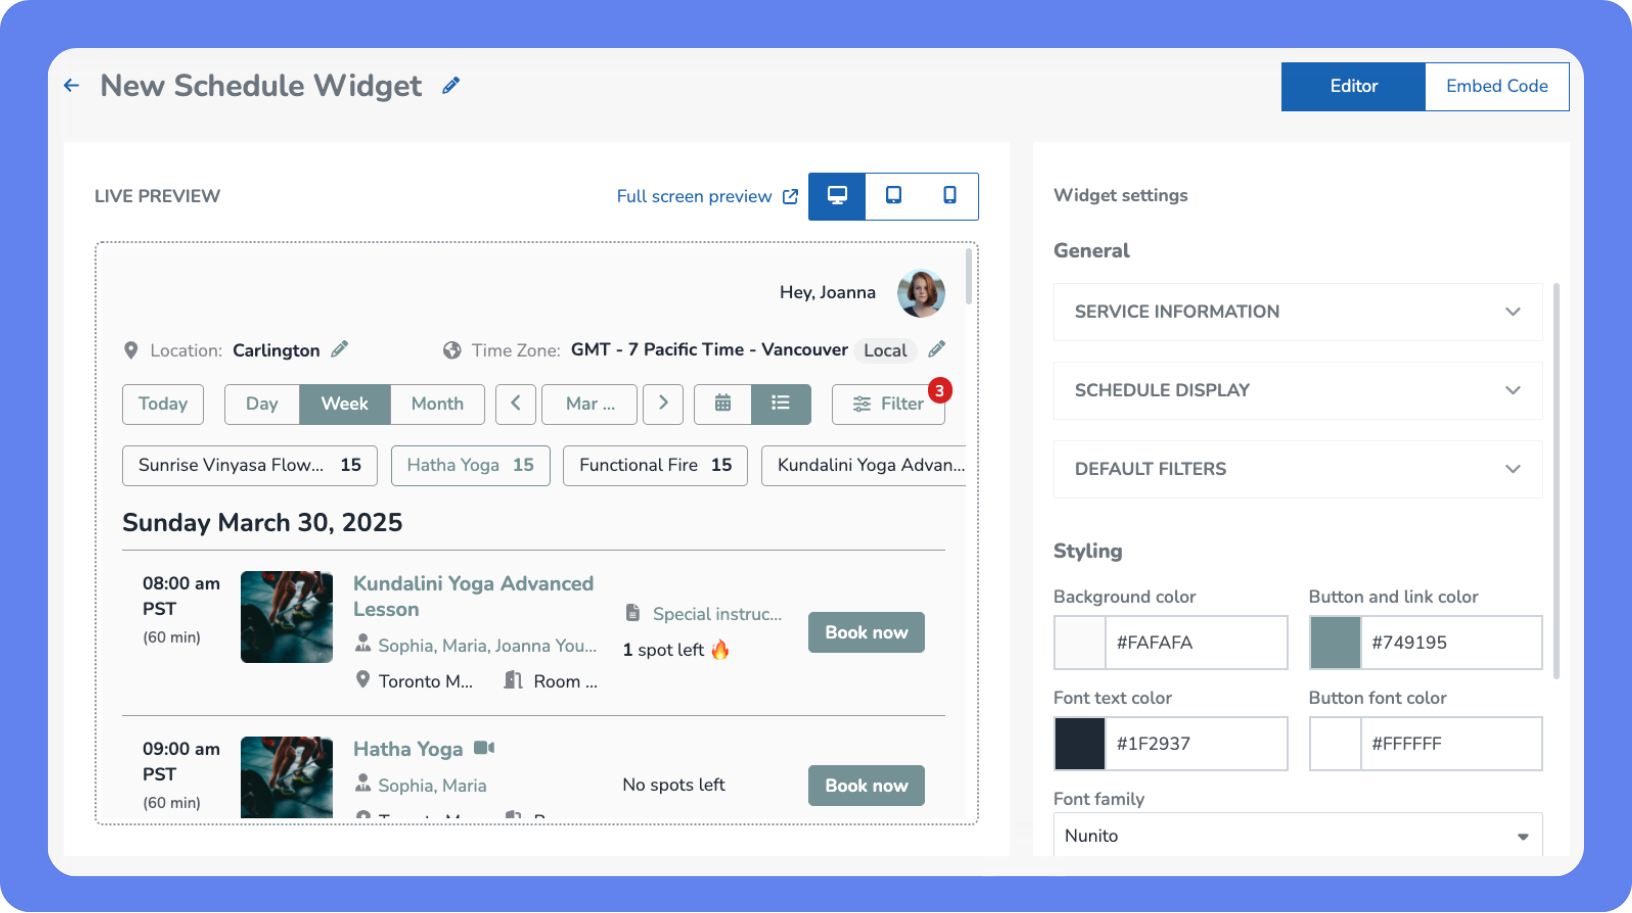
To access your Schedule Widget, open the App Drawer  then click Setup > Website Widgets > 🟢 Schedule.
Next, either click Add Skin to create a new skin, or click the Action  > Edit on one of your existing skins.
Key tips
The Live Preview window shows you what your changes will look like when they’re live. Click the device buttons
 to see how it’ll look on desktop, tablet, or mobile devices, or click Full screen preview.
When your screen is zoomed in, this option doesn't appear.
Click Reset to default in the bottom right to start from scratch.
You can enable Google and Facebook analytics tracking from the Client Portal settings.
Create or modify a Schedule Widget skin
To create or modify a Schedule Widget skin:
Open the App Drawer
then click Setup > Website Widgets > 🟢 Schedule  .
On the Schedule page, create or modify a skin:
To create a new skin, click +Add skin.
To modify an existing skin, click the skin you want to modify in the list.
Customize widget skin settings
To customize your widget skin settings, follow these steps:
General settings
Under Service Information, set the service information that will be displayed in the widget.
Show available spots – Set to ON to let clients see how many spots are left in a class. Then choose how that information appears to them:
Display spots – Shows the number of spots left, for example, "3 spots left."
Display spots and total capacity – Shows the number of spots left and the class's total capacity, for example, "3 spots left of 10."
Display spots booked and total capacity – Shows the number of spots already booked and the class's total capacity, for example, "3 spots booked of 10."
Show room: – Set to ON to display the room where the service takes place.
Show special instructions: – Set to ON to display any special instructions for the service.
Show service image – Set to ON to display the service's image on desktop and tablet. Set to OFF for a compact, text-only layout. This setting has no effect on mobile, which doesn't display service images.
Note: New widget skins have this option set to OFF by default. Widget skins created before this feature released (August 19, 2026) have it set to ON, so their existing image display is unaffected.
Show service duration – Set to ON to display the service's duration, for example, 60 min.
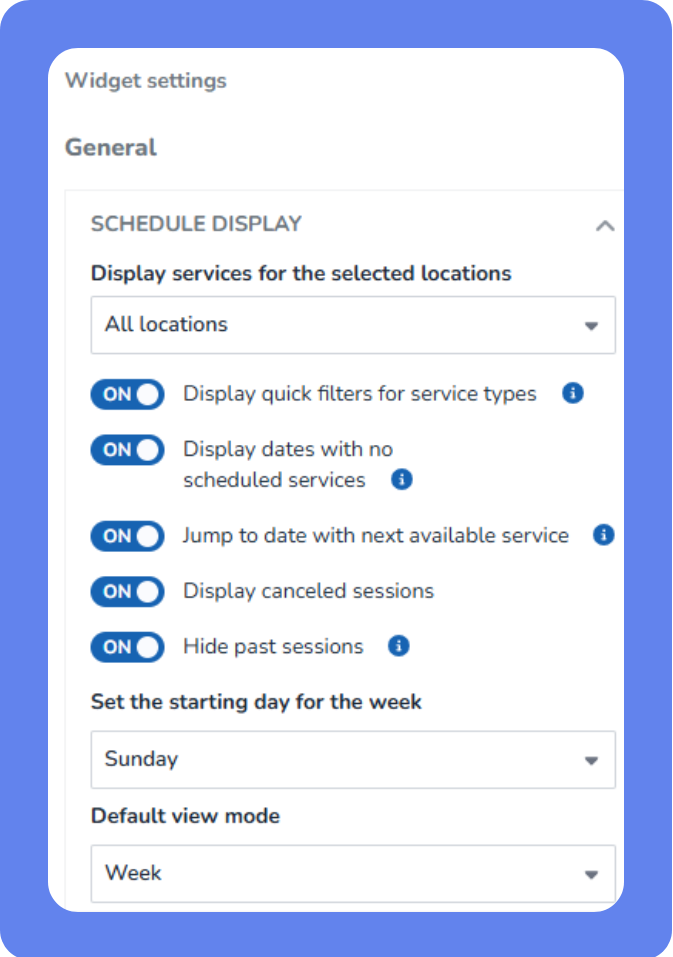
Under Schedule Display, configure all schedule and location-related settings to display.
Display services for selected locations – Use the search field and checkbox list to choose which locations and services to show in the widget.
Select the Select all checkbox to include every location and service.
Select a location's checkbox to include all services at that location.
Click the arrow next to a location to expand it, then select the checkboxes next to individual services to include only those.
Use the search field to find a specific service by name.
Note: If a location's checkbox shows a minus sign instead of a checkmark, only the specific services you've checked within that location are included in the widget.
Display quick filters for service types – Set to ON to allow clients to filter the widget by service type.
Display dates with no scheduled services – Set to ON to show days without scheduled services in the widget’s week view.
Jump to date with next available service – Set to ON to auto-load the next date with services, helping clients find upcoming sessions faster.
Display canceled sessions – Set to ON to display canceled sessions.
Set the starting day for week schedule view – Select the first day to show when the widget is set to week view.
Default view mode – Choose to display the schedule by Day, Week, or Month by default.
Hide past session – Set to ON to hide sessions that have already ended so clients can only see available classes.
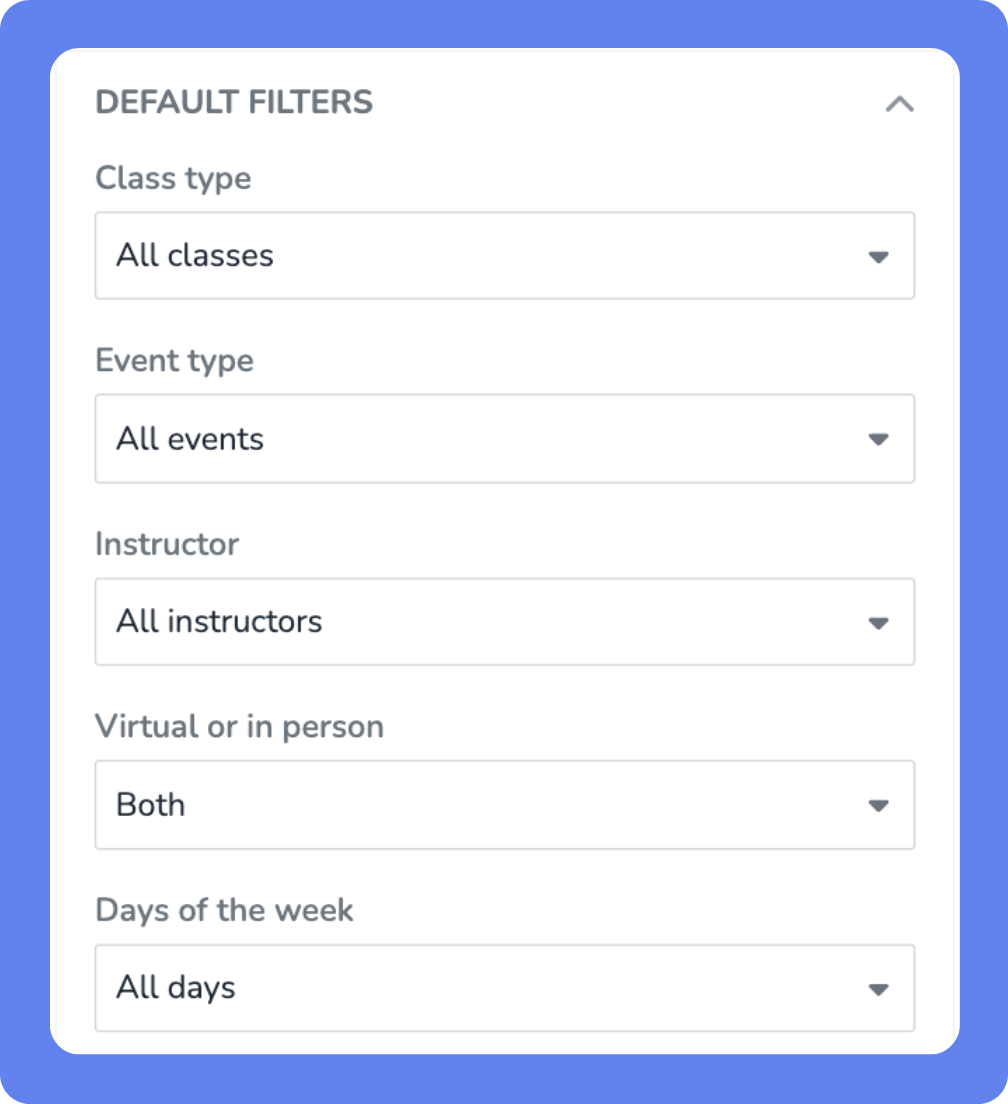
Default Filters pre-filter the schedule based on the selected options, so clients see what’s most relevant to them first, though clients will still be able to see all filters.
Filters include:Class type
Event type
Classes and events are grouped under your Book Now Tabs as collapsible categories. Select an entire tab to include everything in it, or expand a tab to pick individual classes or events.
Select the Select all checkbox to include every Book Now Tab and everything in them.
Use the search field to find a class or event by name.
Select a Book Now Tab's checkbox to include all classes or events in that tab, including ones you add later.
Expand a tab and select individual items to include only those. New classes or events you add to the tab later won't appear on their own.
If a tab's checkbox shows a minus sign instead of a checkmark, only the items you've selected within that tab are included.
If a class or event belongs to more than one tab, it appears under each of those tabs. Selecting it under one tab doesn't select it under the others. It shows in the widget if it's selected under any tab.
If you delete a Book Now Tab, it's removed from the selection of every widget skin that used it. Your other selections don't change.
Existing widget skins keep showing the same classes and events as before.
Instructor
Virtual or in person
Days of the week
Time of day
Styling settings
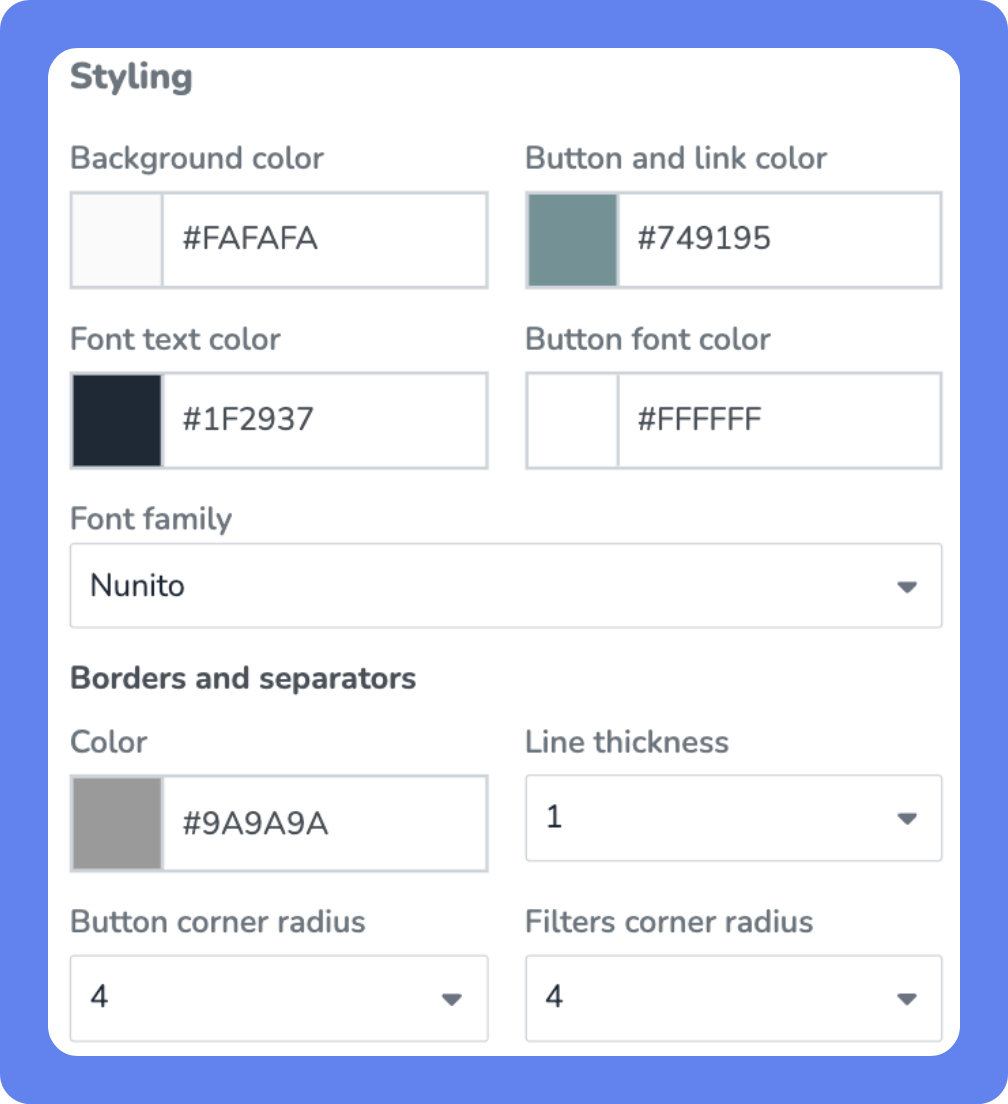
Under Styling, you can configure how your fonts, backgrounds, borders, and buttons will appear on your widget skin. Use the Live Preview window to take a look at how your changes will appear.
Finally, when all of your widget skin settings are configured the way you want, click Save.
Embed your widget
After saving your widget skin, you can embed it on your website in just a few steps.
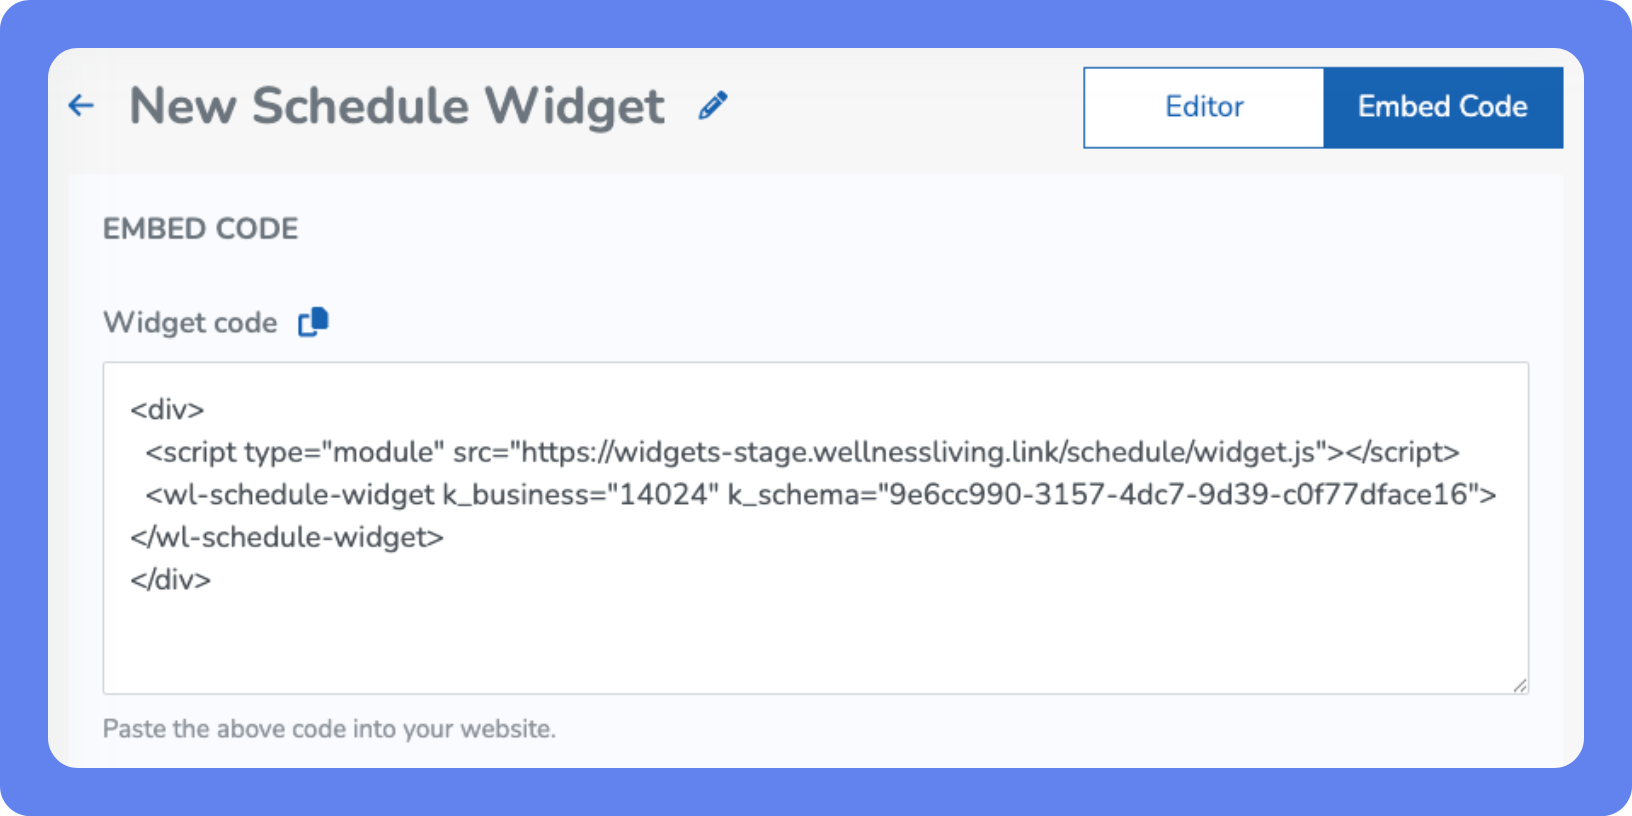
Click Embed Code in the top right to get your widget code.
Click Copy to clipboard to copy the code.
Then, embed the widget code into your website.